
Once you have entered the initial operation details, you move into the planning tab.
You can choose simple or advanced mode using the switch in the header:
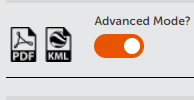
In advanced mode there are seven stages, in simple mode the final three steps are removed.
- Enter Flight Times and Areas and add map annotations
- Allocate Flight Resources
- Review and Respond to Advisories
- Add Supporting Documents
- Risk Assessment
- Method Statement
- Create Checklists
Compulsory sections are indicated by a red asterisk on the section heading and must be completed before proceeding.
1. Enter Flight Details
Fill in the flight details for the first flight area. Start Date, Start Time and Duration are required. Max altitude is set to 400ft by default but can be changed. Anything above 400ft would automatically be in the ‘Specific’ category and would need separate CAA approval.
Click the Confirm button to the right under the flight. This will save the details.

2. Create Additional Operational Intent Areas
If more than one flight slot is needed within an operation, additional slots can be added by clicking the + button below the number of the first flight. You can add as many flight slots as you like up to the maximum in your service plan.
![]()
Clicking to add a flight will bring the map back full screen and allow you to draw additional polygons.
Once a polygon is drawn, the flight details pop-up will be visible again. Fill in the details against the second flight slot and click the Confirm button as before. Repeat this process for additional required flight slots.
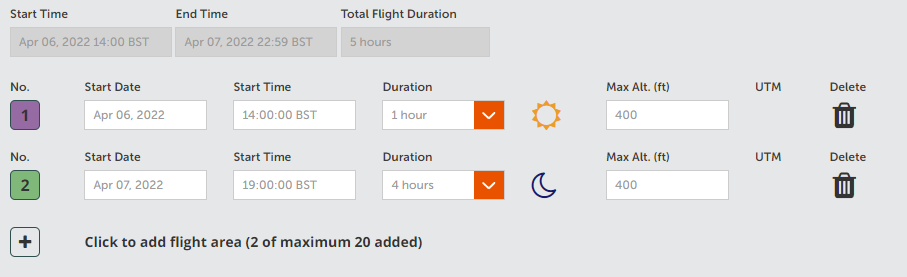
Areas can overlap spatially, but must not conflict in time with each other.
For each operational intent, the system automatically determines if the flight will take place during day or night (as per CAA definitions). If you plan to fly at night, ensure you have the proper permissions and certifications.
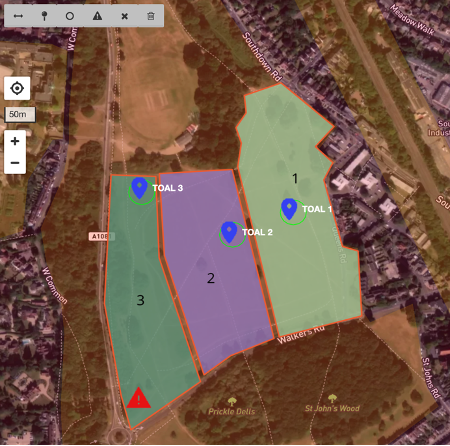
3. Annotate Map
To add map annotations, select a map annotation tool from the toolbar in the top left of the map area and click on the map where you would like it added.
![]()
From left to right, these are:
- Measuring tool
- Pin
- Take-off and Landing Site (TOAL)
- Warning
- Ground Control Point (GCP)
- Delete
Annotations are numbered incrementally as they are added. For TOALs, the system will ask you to enter a safety radius for the TOAL in meters, this radius will show on the map around the TOAL.
You can delete an annotation by clicking on it and then clicking on the Delete button.
Comments can be added to an annotation by clicking on it and filling in the popup box.
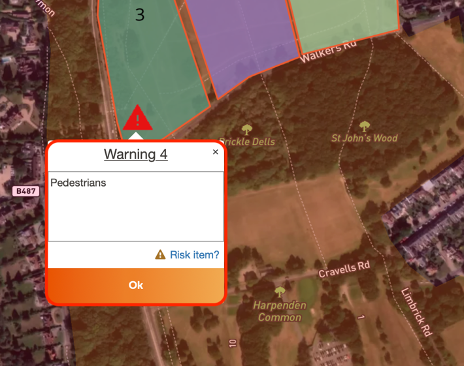
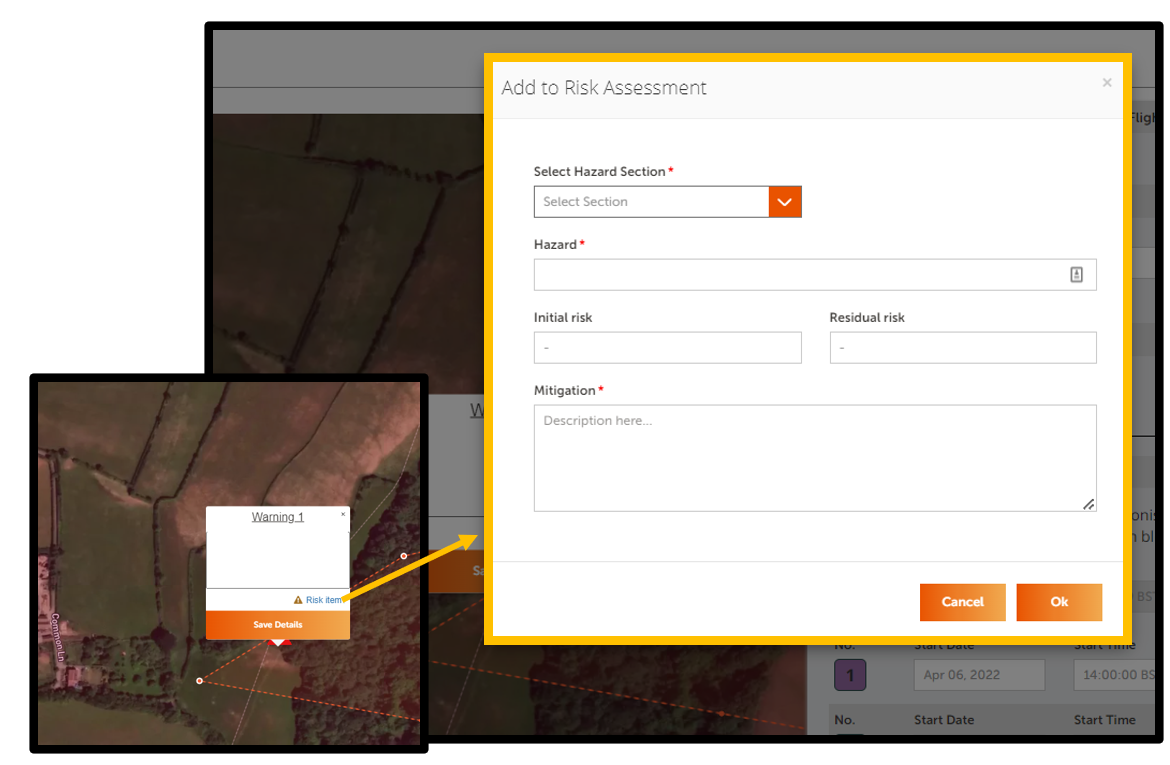
If required, you can add the details of the map annotation to the job’s risk assessment at this stage.
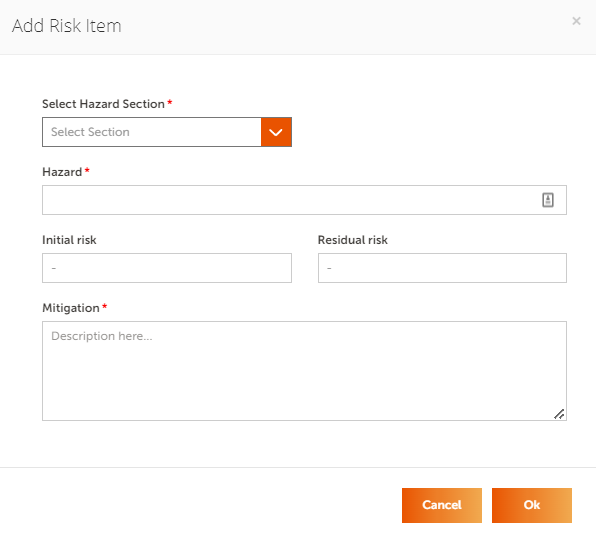
To do this click on the Risk item? link in the comments box. In the pop up fill in the Hazard, Select Hazard Section, Initial Risk, Residual Risk and Mitigation fields. Once all fields have been filled out for a hazard, click the Ok button at the bottom to append it to the job risk assessment.
4. Allocate Flight Resources
In the planning page, click on the arrow to the right of the Allocate sub section to display the allocation fields.
Select aircraft from the Aircraft Name drop down list and choose either a vehicle from the fleet database. If you have no aircraft in your fleet, then you will need to add an aircraft before proceeding.
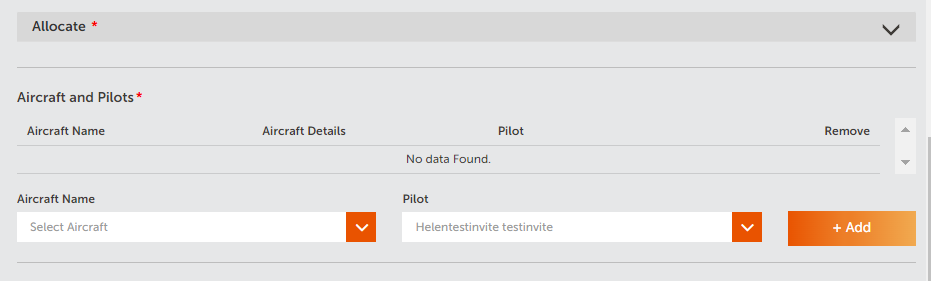
The pilot dropdown will default to the Operation Owner if they are registered in the system as a pilot. You can change the selected pilot if required.
Add as many aircraft and pilots as needed. Repeat these steps to add additional personnel and equipment to the operation.
5. Review and Respond to Advisories
An important feature of Dronecloud presents you with advisories specific to your flight’s location. You should acknowledge these advisories and, where appropriate, provide additional commentary to describe how any risk relating to the advisory can be mitigated.
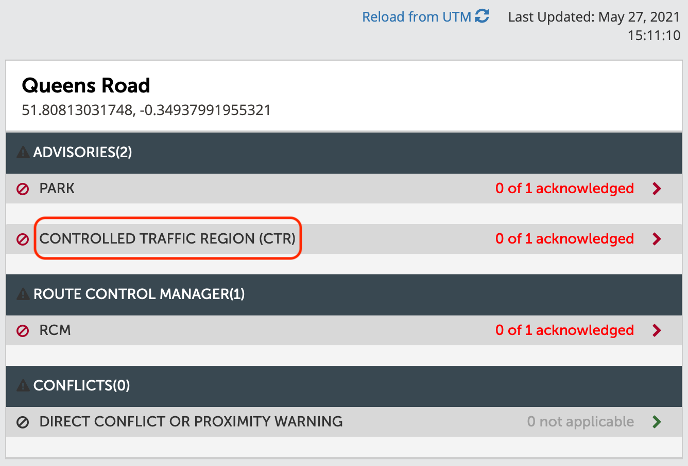
The advisories section will indicate if there are any advisories for your operation.
![]()
Click on an advisory name or red arrow to the right to get more details on that advisory.
![]()
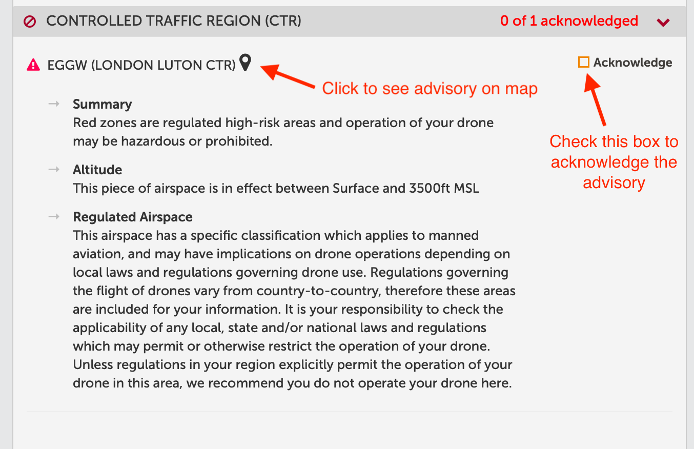
Check the Acknowledge box to acknowledge the advisory. You can also click the advisory name to see it on the map.
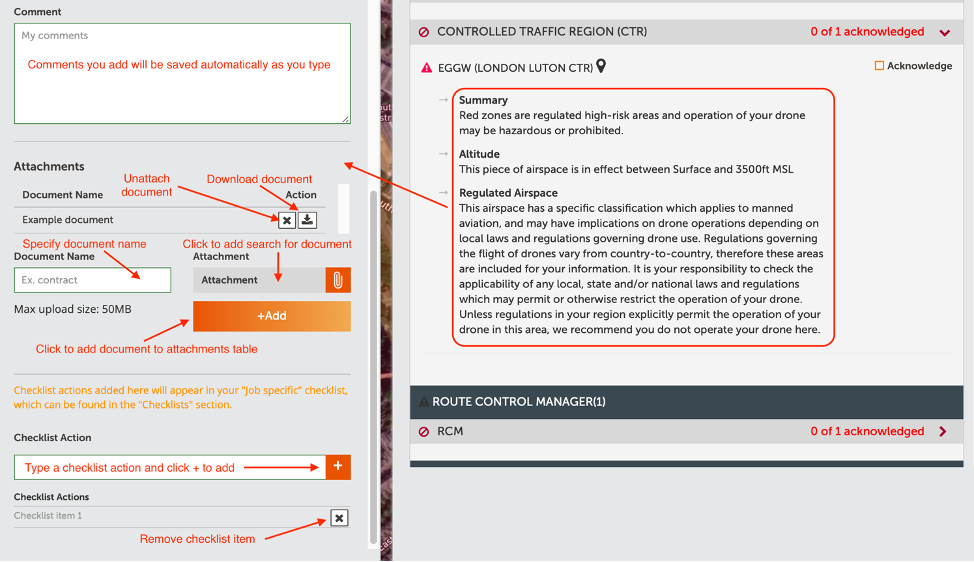
Click anywhere on the advisory text to get a pop up where you can add comments, attach documents and add checklist actions.
6. Add Supporting Documents
You can upload additional relevant compliance documentation in the Supporting Documents sub section. Click on the arrow to the right to display more information.
![]()
Upload additional compliance documentation by clicking on the paperclip to the right choosing a file. Type the name for the document to be saved on Dronecloud in the Document Name box to the left. Then click +Add to save it to the system.

You can also import documentation previously saved to Dronecloud. Choose a previously saved document from the drop-down menu and click the Import button.

7. Risk Assessment
The next step is to complete a risk assessment. Click the arrow next to the Risk Assessment sub section to display more information.
![]()
You can create risk assessment templates in the Settings area of the platform (admin only). You can then Import Risk Assessment Items from Template drop down menu. A Template is not required but will make common items quicker to assess.

Choosing a template will populate the risk assessment with pre-scored hazards and risk sections. To edit a risk section, click the pen icon to the right of the section name.

Additional hazards can be added to the risk assessment by clicking the Add Risk Item button and completing the required sections.
8. Method Statement
Next you can provide a method statement for the operation.
Click the arrow next to the Method Statement sub section to display more information.
![]()
You can select an existing template by clicking in the Load template box.

To choose an existing template, select the one you want from the drop-down menu and fill in the job’s method statement details in the box below. This will save as you type. If you would like to alter the template itself, click the Update template button.
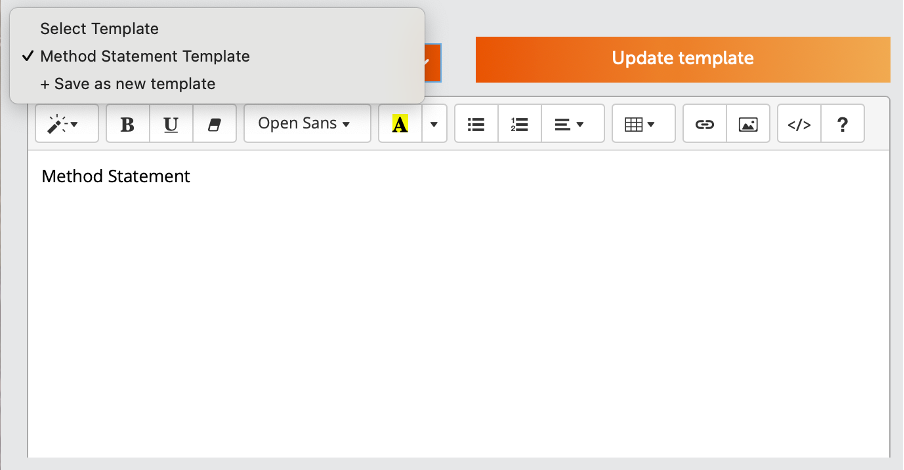
If you would like to save a new template, create the template details in the method statement box and choose + Save as new template in the drop-down menu of the Load template box.
Fill in the name of the new template in the Template name box and click the Save as a new template button to the right.
![]()
9. Create Checklists
The checklists section of flight planning allows you to either import existing or create new checklists. These checklists are presented to you during the in-flight stage of the flight management allowing you to actively check off actions as you have completed them. Example of these could be pre-flight checks or operation specific checks.
Click the arrow next to the Checklists sub section to display more information.
![]()
Your organisation's default "Operation Specific" Checklist will be automatically loaded into the table. You can also import additional checklists or create new checklists here.
You can delete or download any checklist items by clicking the Action buttons. You can view a checklists items, add or remove items by clicking on the checklist name.
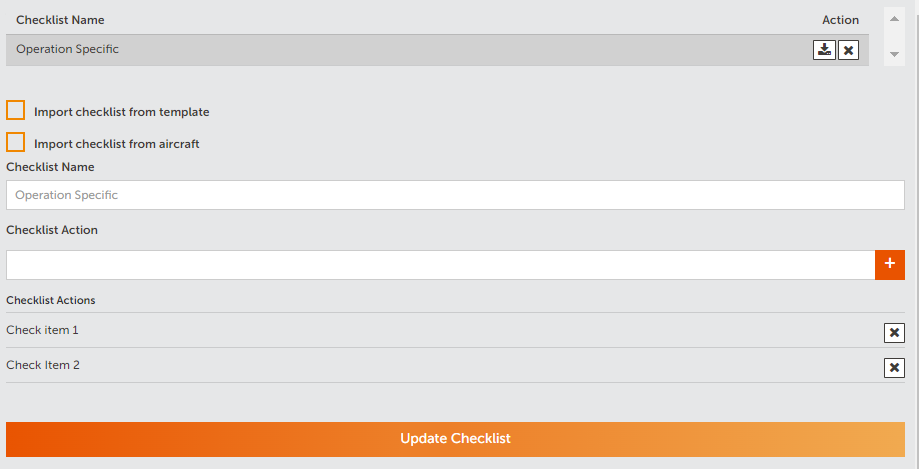
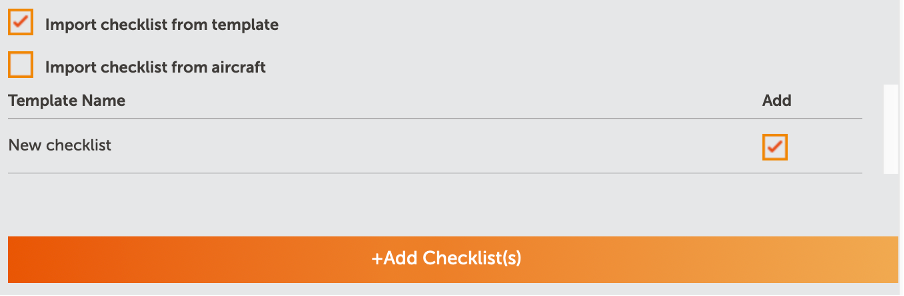
To import a checklist, check either the Import checklist from template or Import checklist from aircraft box. Choose one or more templates from the list of available ones below by checking the relevant Add boxes to the right. Then click the +Add Checklist(s) button. Imported checklists will appear in the list above.
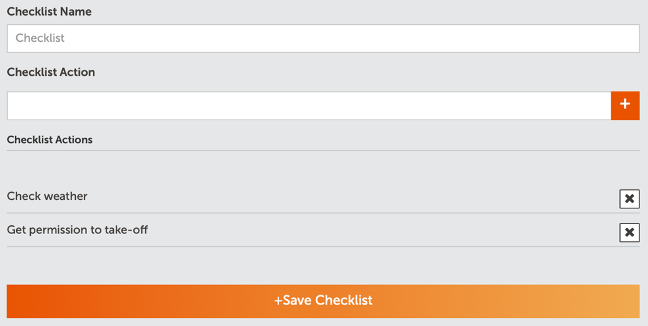
To create a new checklist, create a new name in the Checklist Name box and write an action in the Checklist Action box. Add an action by clicking the + button to the right. As actions are added they will appear in a list below. Once the checklist is complete, click the +Save Checklist button at the bottom to add the new checklist to the job’s list of checklists.
10. Submit Flight Plan for Approval/Finish Flight Planning
Once all sections of flight planning have been completed, click the Flight Planning Complete or Submit plan for approval button (depending on whether approvals are required or not).
This will change the job status to ‘Awaiting Approval’ or 'Flight Scheduled' accordingly, and it will synchronise the operational intent areas and times with the UTM. The flight timeslots will show a synchronised with UTM symbol ![]() in the UTM column and other users of the UTM system will be aware of your planned flight areas and times.
in the UTM column and other users of the UTM system will be aware of your planned flight areas and times.
Note that in the UTM, the map will show the planned flights with a buffer around them. This buffered area is reserved airspace in the UTM for deconfliction purposes and can be seen by other users.
Comments
0 comments
Article is closed for comments.